WIA-Loader Manual

Import-Profiles

The centerpiece of WIA-Loader's configuration are import profiles. They specify where the transferred pictures are copied to, whether they are renamed, whether they are linked with GPS position data, or whether changes are made to the EXIF information, etc.
An import profile is divided into several steps. These can be freely arranged and extended. Every import profile consists of at least a 'Transfer' step and a 'SaveAs' step. Beyond that, a number of additional steps are available to tailor the import to your own requirements.

More steps can be added via the menu. The order of the steps can be changed in the list by dragging them with the mouse.
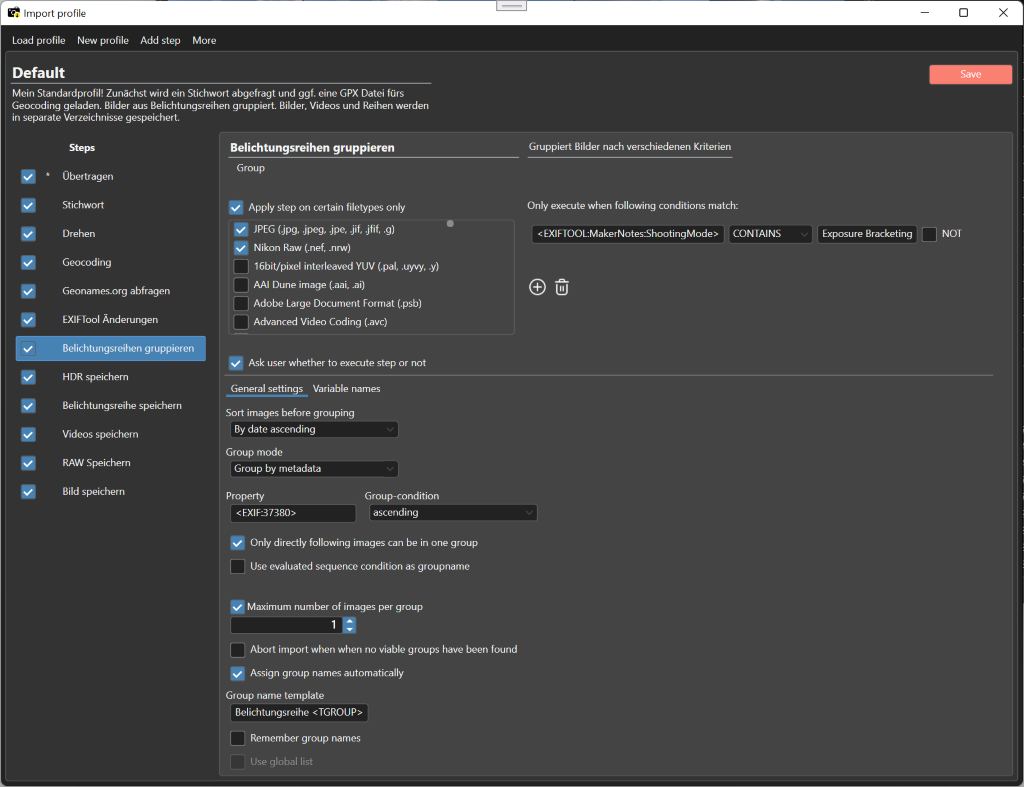
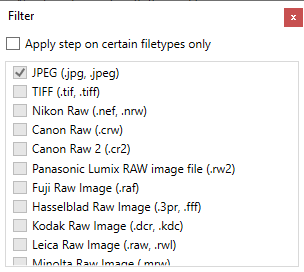
For each step you can configure the conditions under which it is executed at all. For example, you can specify that certain steps are only executed for certain file types. A more advanced option is to only execute the step under certain conditions.

This import step, for example, is only applied to the file types checked on the left side, where the metadata field MakerNotes:ShootingMode read via EXIFTOOL contains the value 'ExposureBracketing'.


Available steps

Among others, the following steps are available:

Transfer

Every import profile should start with this step. It transfers the picture from the camera or memory card to your PC.

SaveAs

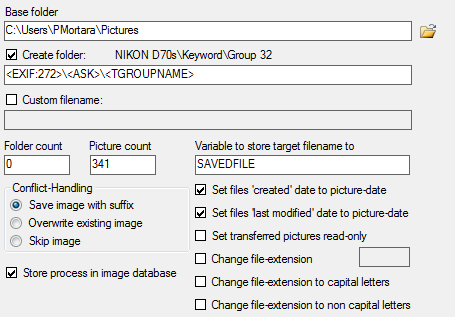
Where WIA-Loader transfers your pictures to is set in the 'SaveAs' step. After 'Transfer', this is therefore the second most important import step and must not be missing from any profile.

First you choose the base directory. All pictures will later be saved inside or below this folder.

Then you can choose whether/how subfolders are created and whether/how the transferred pictures are renamed. An overview of the naming options for subfolders and pictures can be found in the Variables chapter.

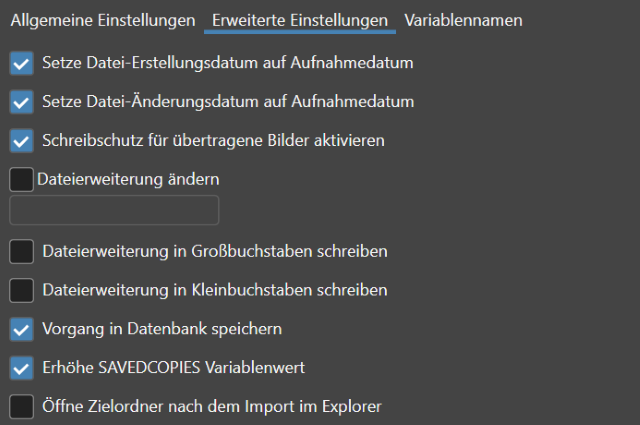
The 'Advanced settings' tab lets you configure several additional things, but normally the default settings can be kept as they are.

Rotate picture

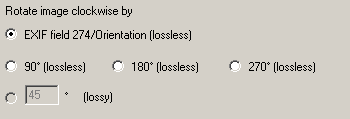
A configurable import step for rotating pictures. You can either rotate the picture based on the EXIF field 'Orientation' (field no. 274) so it ends up upright, or rotate it clockwise by a fixed or freely chosen angle.

Resize picture

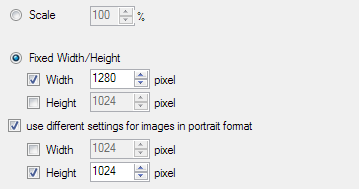
This import step lets you resize a picture during import. You can choose between a percentual change of the picture size and a change to a fixed width and/or height. If you only set a fixed width or a fixed height, the picture's aspect ratio is kept. If you enable both at the same time, the aspect ratio changes according to the sizes set.

Keyword

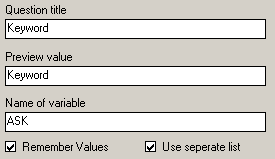
A simple way to tag transferred pictures is to use a keyword in the file or folder name.

If 'Remember input' is active, keywords that have been used once are offered in a central list for later imports. If 'Keep separate list' is active, a dedicated list is kept for this import step.

EXIFTool Changes

Phil Harvey's ExifTool can be used to change metadata.

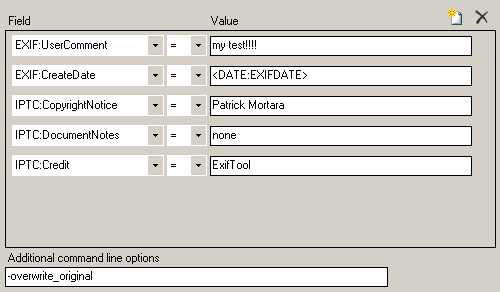
All changes to be performed are configured in the list above; below that, various other settings and additional command-line parameters can be specified. The parameter '-overwrite-original' should be kept, otherwise WIA-Loader's workflow will be disrupted.
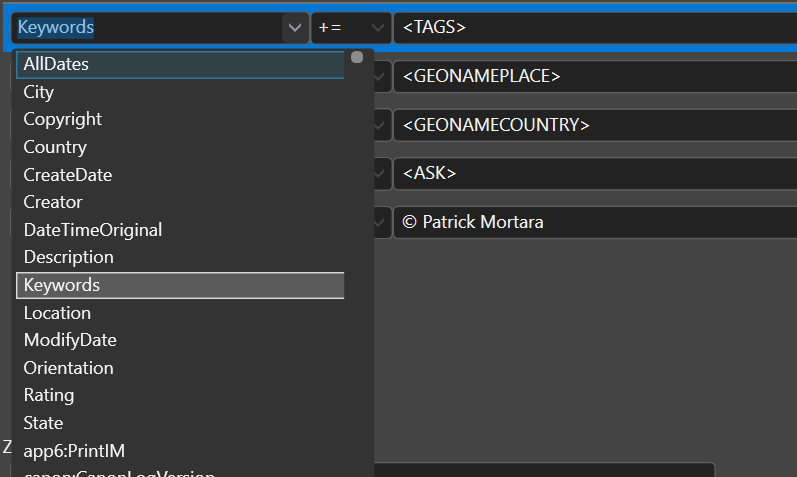
The MWG mode (Metadata Working Group) is a special mode that keeps various metadata fields from the EXIF, IPTC and XMP areas in sync. These fields appear at the top of the list of available fields. More about this here.

DNG Converter

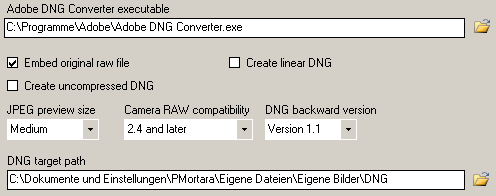
This import step uses Adobe's DNG Converter to convert your RAW files into the DNG (Digital Negative) format.

DCRaw

As an alternative to the DNG Converter, this step lets you use dcraw.exe to process RAW files, for example to 'develop' JPEG files from them.

SaveAs to FTP

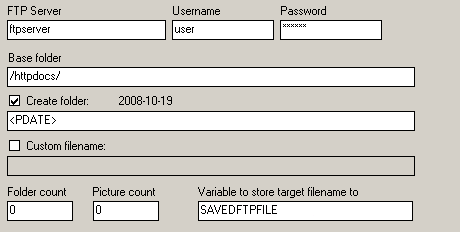
In addition to saving pictures on your hard drive, you can also upload them to an FTP server. This requires an FTP server as well as a username and a password.

Execute Script

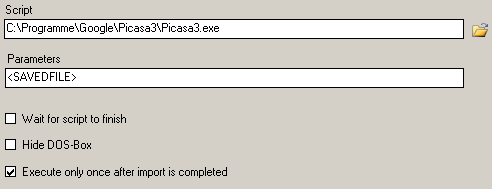
Executes an external script or program. In the example below, Picasa is started after the import is complete and the path of the last imported picture is passed as a parameter.

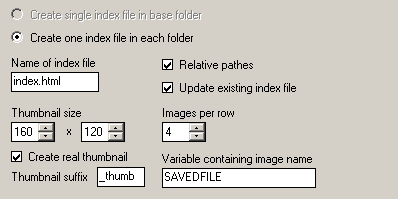
Creates a simple HTML gallery for the imported pictures.

Change flow

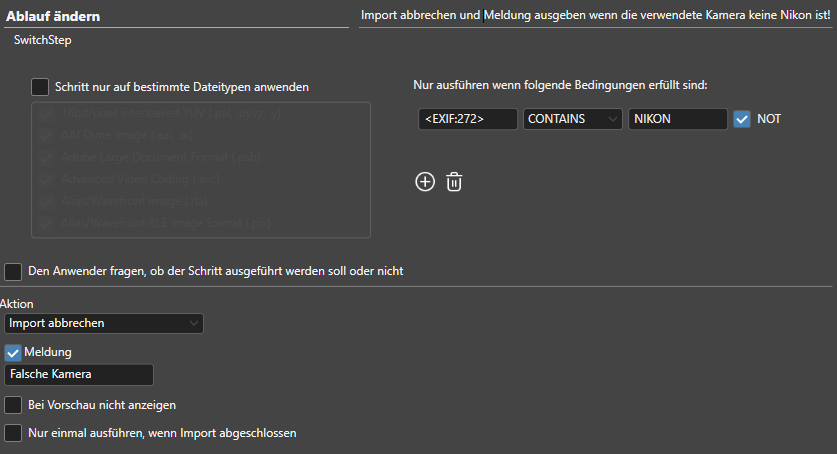
This step is used to influence the current import flow. For example, WIA-Loader can be told to skip the current picture or show a message when certain conditions are met.

Create variable

This step creates a new variable during the import.

ImageMagick

This step runs ImageMagick with the current picture. ImageMagick has to be installed on your PC and the path to Magick.exe has to be set in the settings.

The available settings correspond to ImageMagick's command line parameters. A description of these parameters can be found here.

Image counter

This step creates a variable that is incremented with every image that is imported.

Usage

Many of these steps only make sense when combined with a matching condition. The Change flow step, for example, could be used to show a message if EXIF field 272 (camera model) does not contain the text 'NIKON':